PROGRAMMING THE PHYSICAL HARDWARE
Introduction
This topic discusses how to program the Arduino hardware from inside Proteus Visual Designer so that you can see your projects working in the real world.
For technical support or problems with programming please refer to either the troubleshooting guide below or to the following Arduino resources:
- https://www.arduino.cc/en/Main/FAQ
- https://forum.arduino.cc
- https://forum.arduino.cc/index.php?topic=261445.0
A Quick Guide to Programming
For convenience, Proteus Visual Designer includes an interface to the Arduino AVR programmer. To program your hardware from inside Proteus you will need to :
1. Make sure you have the Arduino drivers installed. If you don't you can install them from the Labcenter Program Group or by installing the Arduino IDE from their website.
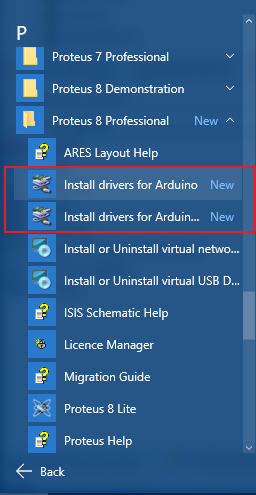
Installing Drivers from the Labcenter Program Group in the Start Menu.
2. Go to the Project Settings dialogue

Launching the Project Settings Dialog in Visual Designer
3. Specify the programmer (AVRDUDE) and the board (eg. UNO)
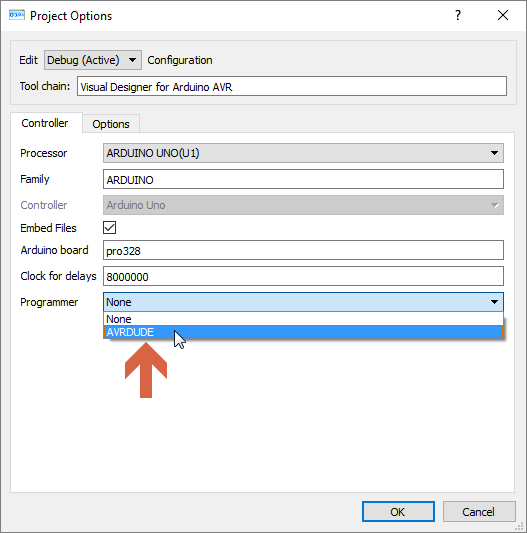
Specify the Programmer.
4. Specify the correct Interface based on the physical hardware you have connected.
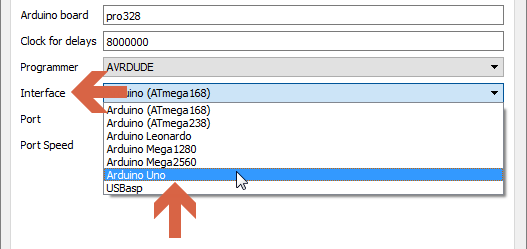
Specifying the Interface.
5. Plug in the hardware, check device manager and enter the COM Port that your PC is using for the USB here. Refer to the instructions below if you are unsure what to select
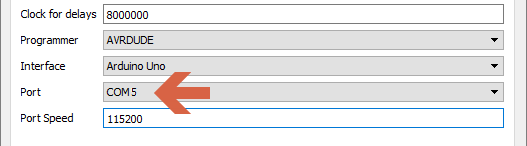
Set the Correct COM Port.
6. Compile your program and press the program button to transfer to the real hardware

Build and Program the Hardware.
You should receive the following message:

Completed Upload to Hardware.
The Controller Dialog
Apart from the basic programming options there are a number of additional options on the dialogue form which are discussed in full below.
Launch the Project Settings Dialogue Form.
Processor, Family and Controller
The Processor, Family and Controller fields are set when you create the project and will be automatically populated for you in this dialogue form.
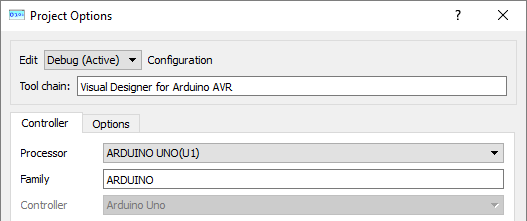
Processor, Family and Controller Options are preset when you create the project.
Embed Files Option
The Embed Files Option keeps all source and debug files inside the .PDSPRJ file container. This avoids common problems with relative paths to libraries and files as well as making the project easily portable. We do not recommend turning this option off without good reason.

Arduino Board Option
The Arduino board option is a string which is passed to, and used by the Arduino compiler and linker to identify the processor on the board. Do not change this option unless you are confident that you know what you are doing.

Clock for Delays Option
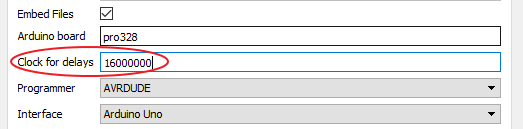
The clock for delays option is basically the processor clock frequency. For simulation, this is halved to 8MHz to ensure good performance even on modest computers. For the real hardware it needs to be changed to 16MHz but there are two ways to do this.
We recommend that you leave the value in the field alone. Each time you upload you will get a message explaining the discrepancy and Visual Designer will then program the real board with the correct 16MHz clock. This option give the best of both worlds as you will simulate with an 8MHz clock and program with a 16MHz clock.
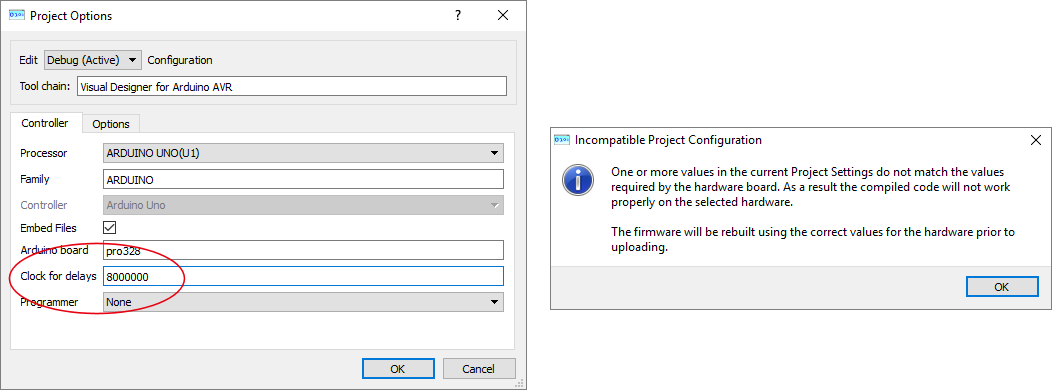
Leave the clock option alone for best simulation performance while maintaining correct hardware compilation.
If you prefer, you can change the value in the field to 16MHz. This will be correct for the real hardware but may impact simulation performance.
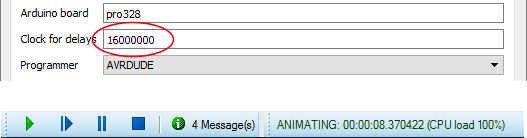
Change the clock for correct hardware compilation at the expense of degraded simulation performance.
Programmer Option
The programmer field should be set to the AVRDUDE programmer. If this is not available/installed then you can easily get it by installing the Arduino IDE from their website.
Interface Option
The interface field should then be set according to the real hardware (e.g Arduino Uno for the Uno board).
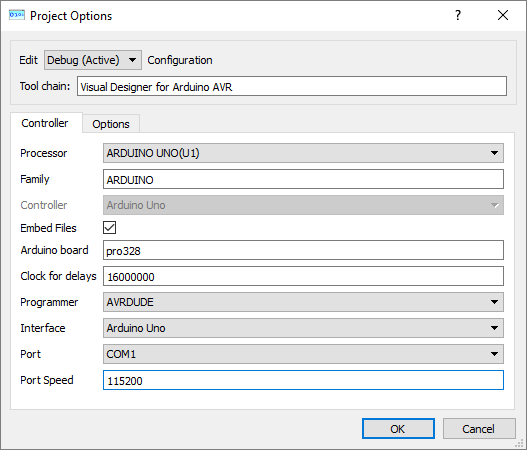
COM Port Option
The COM port field is likely to cause the most confusion. This is determined by your PC when you connect the Arduino hardware to the computer and it is vital that you provide the correct port number in this field. The easiest way to make sure you have the correct number is to
a) Open Device Manager.
b) Plug in the Hardware
c) Make a note of the COMx number that appears and select it in the Port field.
See Also:
Port Speed Option
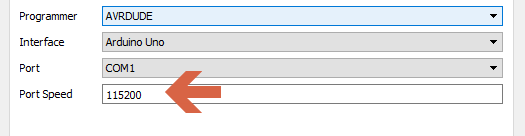
The Port Speed or baud rate option is defined in the Arduino datasheets (e.g. 115200 for the Arduino Uno) and should not be changed unless you are sure that you know what you are doing.
Resource Uploader
Finally, the Resource Uploader file is used by Labcenter to automatically transfer Visual Designer resources such as WAV files and Bitmaps to the SD card. You should not modify this field.

Troubleshooting Guide
Program Button is Disabled
Problem
This happens when the programmer is not installed or set.

Solution
Plug the USB cable in to the board and in to the PC. Make sure that the board has power (LEDs will light up on the board). Visual Designer does not automatically detect that a board has been plugged in so the Upload icon may still be greyed out. Click on the Project Settings icon:
We need to let Proteus know which programmer we wish to use. In this case it is the AVRDUDE If there is nothing listed you will need to install Arduino IDE from: https://www.arduino.cc/en/Main/Software
Programming takes a long time and then reports multiple errors
You can stop a build or program at any time by clicking on the Stop Build icon on the toolbar
There can be several different causes for this...
Cause 1
Problem
The wrong COM port has been selected. Go back to the Project settings and select the correct COM port.
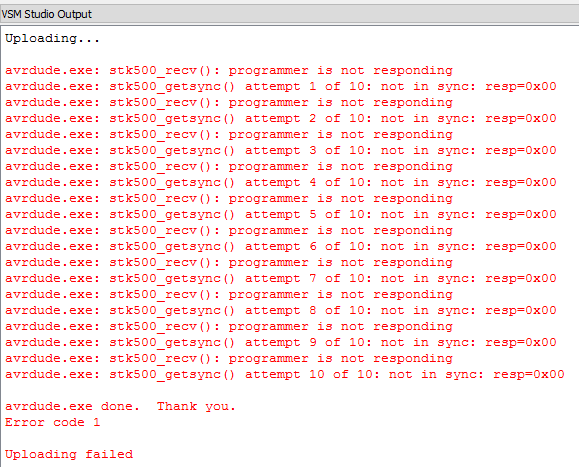
Solution
- Making sure the board is plugged in
- Open the Windows Device Manager
- Select 'Windows Device Manager > Ports (COM & LPT1) > USB Serial Device (COMx)'.
- Use what ever COM port number is stated there.
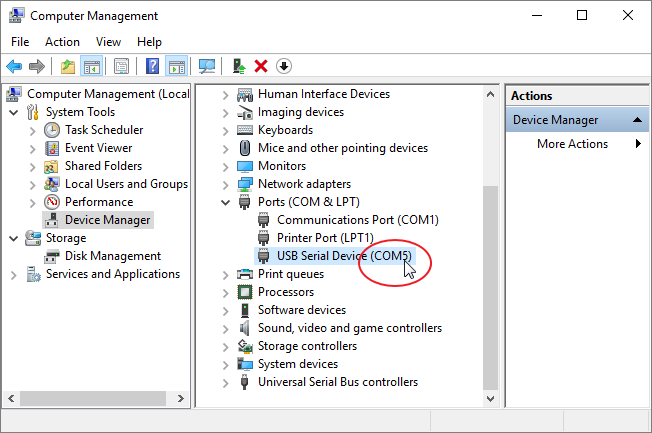
Cause 2
Problem
Incorrect Port Speed.
Solution
Have a look on the data sheet to find out what the Port Speed should be and in the project Settings form, change it to be the correct number (Generally 115200).
Clock for Delays Error
Problem
You get the following error messges:
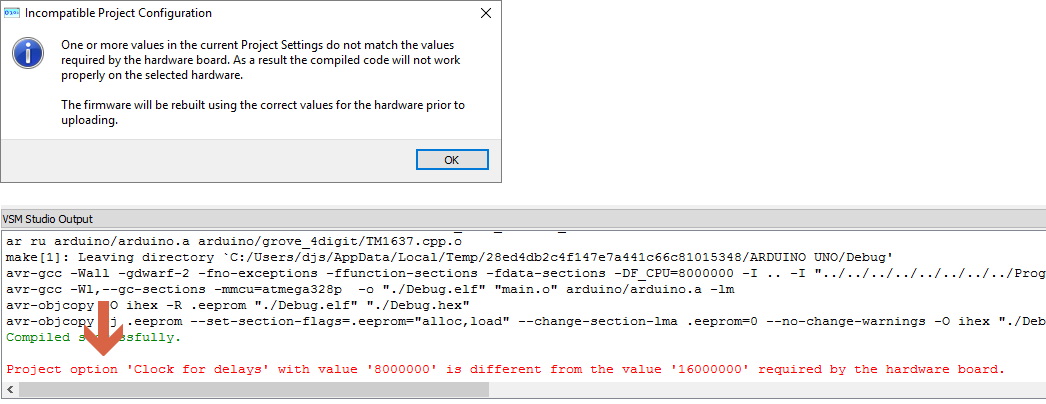
This will generally be because the clock speed / 'Clock for Delays' value on the board for this particular variant is different than that of the program. In the error message in the output window, it will show the 'set' value in the in the Project Settings dialog, and the 'expected' value required by the board. The software will compile the code with the 'expected' and upload the program. But it will not change it in the settings, so this error will always appear every time the Upload button is pressed.
Solution.,
This is not necessarily a problem. Indeed, for good simulation performance on modest computers it is almost essential that the clock speed for simulation is different from the clock speed of the real hardware. However, if you do want to change the field to be consistent you can do so by going to to the Project Settings dialog and set the Clock For Delays to be the 'Expected' value or read the datasheet for that variant to find out what the clock speed should be..
ELF File not found
Problem
There is no compiled firmware to upload
Solution
Compile the firmware via the build button and then try again.
